Create a Realistic Metal Text Effect Using Layer Styles
Quick Tutorial: Create a Realistic Metal Text Effect Using Layer Styles
Today I'll be showing you how to create a realistic metal text effect using only 2 layers! Sound to good to be true? Well read on... even a beginner can following this quick and easy tutorial.
Final Image:
Here is the final image that we will be creating from scratch using layer styles and filters:

Step 1:
First we will create pattern.
Please create new document. Press Ctrl+N on your keyboard.
Use 150 px as a width and height.
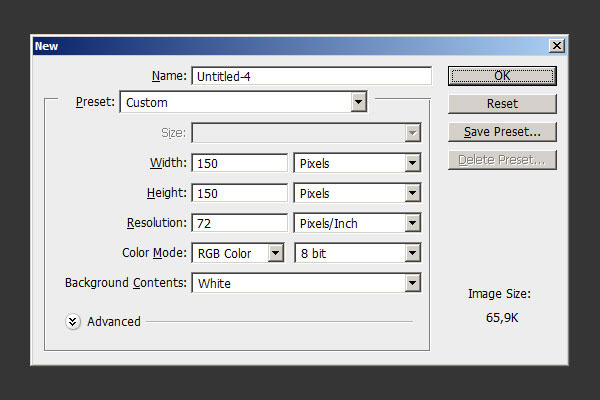
Use white background. Now go to Filter -> Noise -> Add Noise
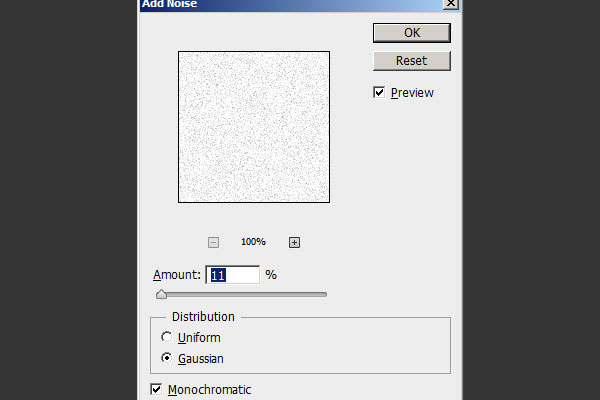
Next press Ctrl+F to apply filter again with same settings.
Now go to Edit -> Define Pattern
Step 2:
Next create new document. Press Ctrl+N on your keyboard.
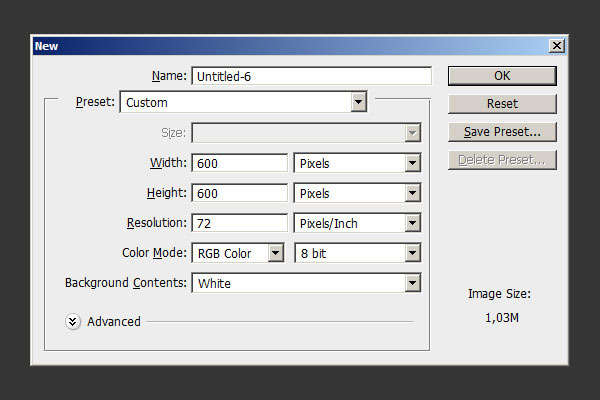
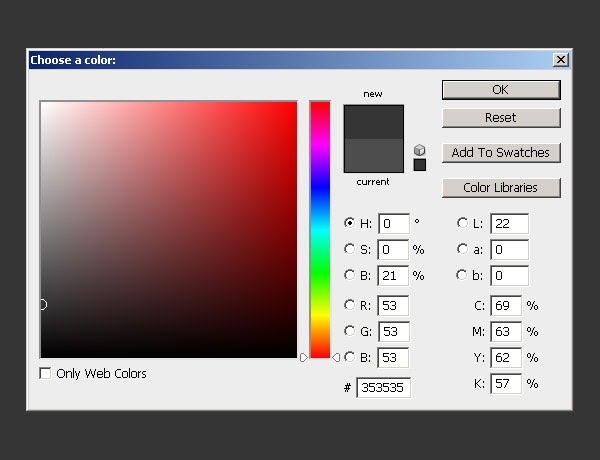
Use dark grey for a background.
To do this press Shift+Backspace , and from the dropdown menu choose color.
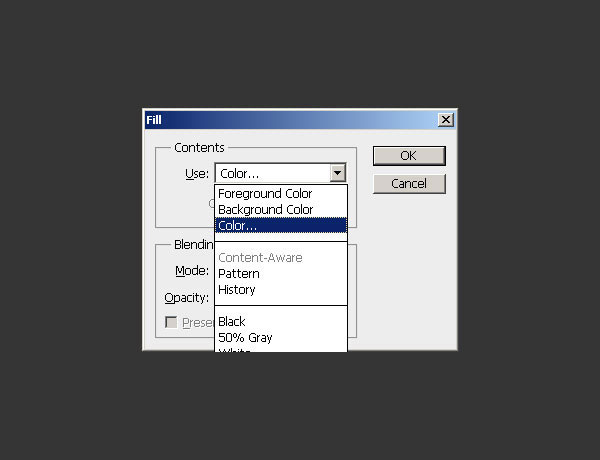
and choose 353535 from color window.
Next apply
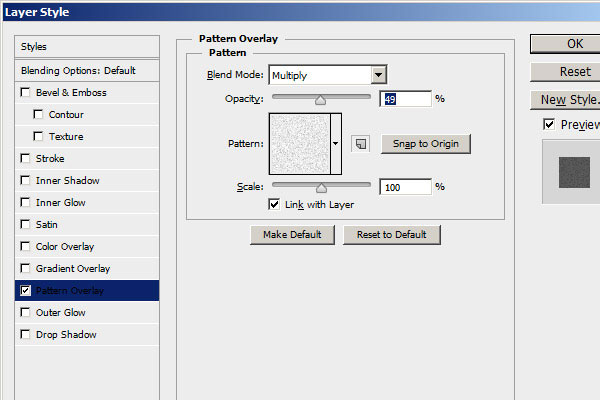
Pattern Overlay:
Blend Mode: Multiply
Opacity: 49%
Choose pattern we just created
Scale: 25%
Step 3:
Select Horizontal Type Tool and type desired letter, with desired font. Font I used is Intro Inline. Use 800pt size.Color is not important at this stage, we can use black.
We will use Layer Styles to style the layer.
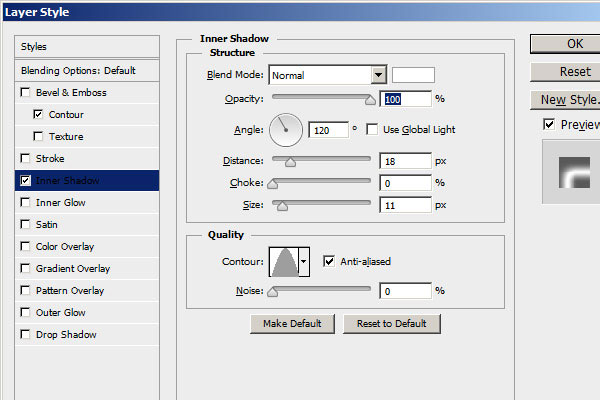
Inner Shadow:
Color: ffffff
Blend Mode: Normal
Opacity: 100%
Angle: 120 degrees
Distance: 0px
Choke: 100px
Size: 3px
Noise: 0%

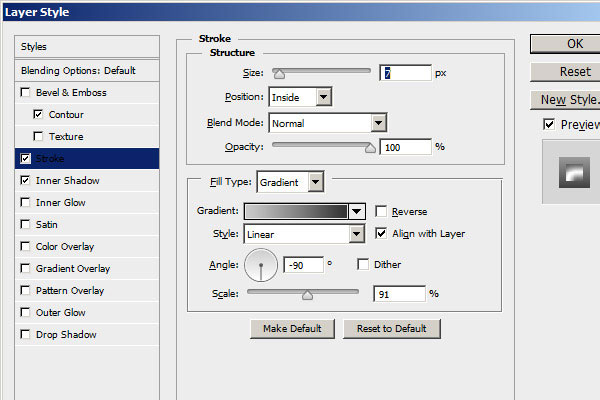
Stroke
Size: 7px
Position:Inside
Blend Mode: Normal
Opacity: 100%
Fill Type: Gradient
Gradient Ranging From: cacaca through 848484 to 333333
Style: Linear
Angle: -90
Scale: 91

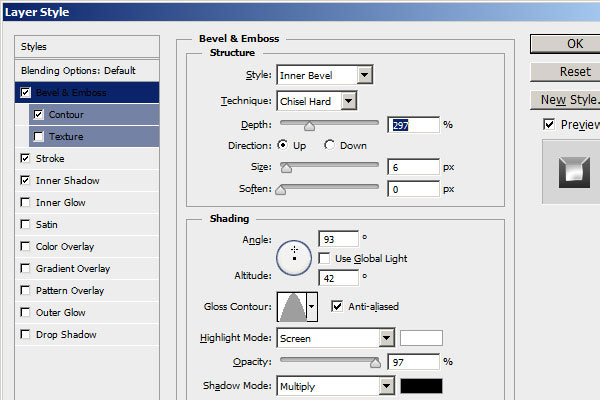
Bevel and Embos:
Style: Inner Bevel
Technique: Chisel Hard
Depth: 297px
Direction: Up
Size: 6px
Soften: 0px
Gloss Contour:Cone
Higlight Mode: ffffff Screen 97%
Shadow Mode: 000000 Multiply 36%
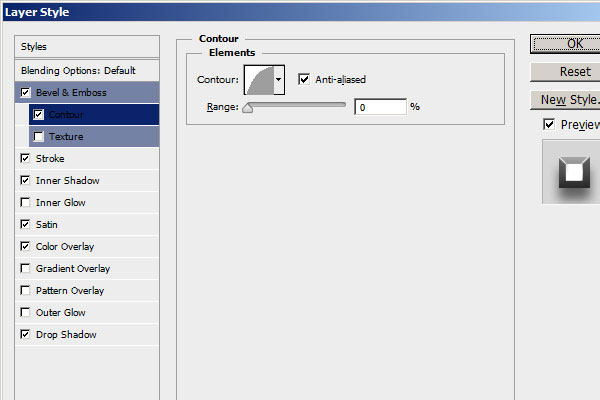
Contour: Half Round Range 0%

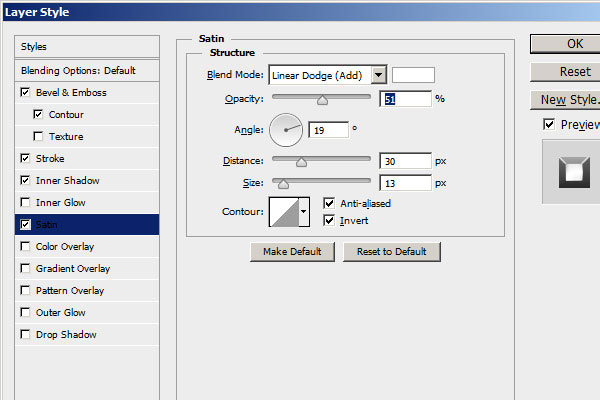
Satin:
Blend Mode: Normal
Color: cd9600
Opacity: 52%
Angle: 19 degrees
Distance: 12px
Size: 14px
Contour: Invert

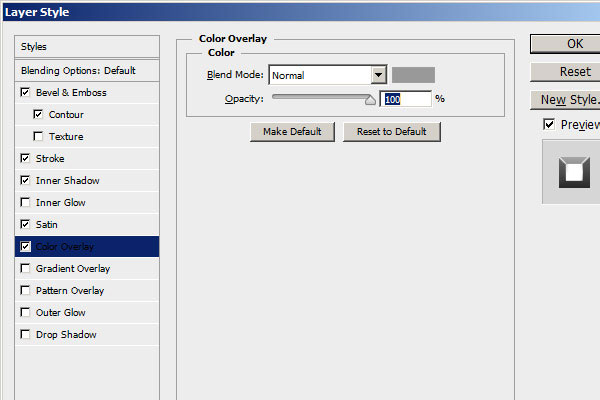
Color Overlay:
Color: 903300
Blend Mode: Multiply
Opacity: 27%

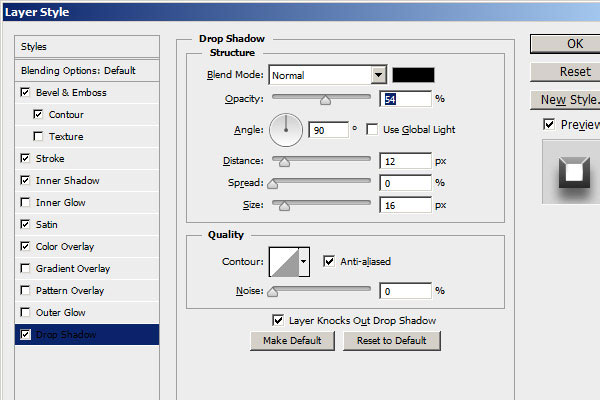
Drop Shadow:
Color: 000000
Blend Mode: Normal
Opacity: 54%
Angle: 90 degrees
Distance: 12px
Spread: 36px
Size: 16px
Noise: 0%

Step 4:
Now Press Ctrl+J to duplicate your text layer, next remove previously applied layer styles from this new copy layer.
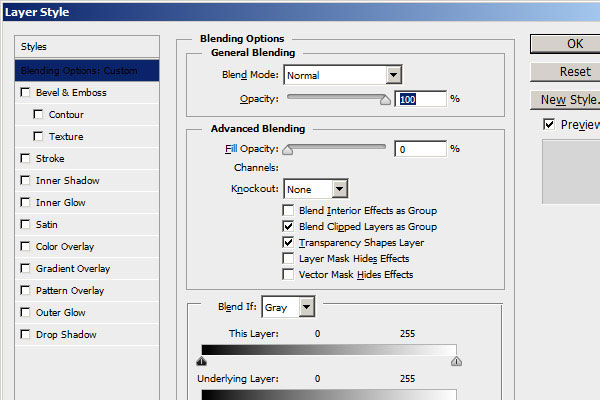
Now change Fill Opacity to 0% to do this go to Layer -> Layer Styles -> Blending Options...
Now please apply
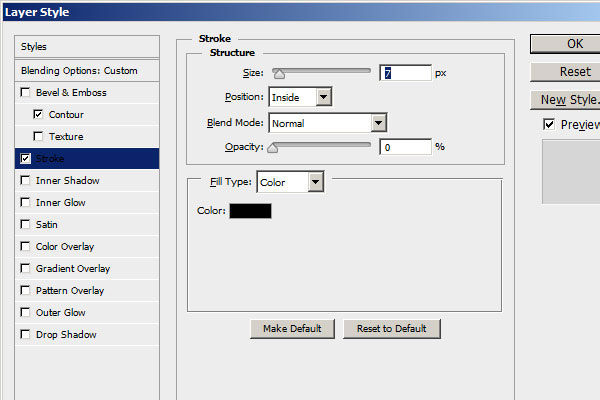
Stroke
Size: 7px
Position:Inside
Blend Mode: Normal
Opacity: 0%
Fill Type: Color
Color: 000000
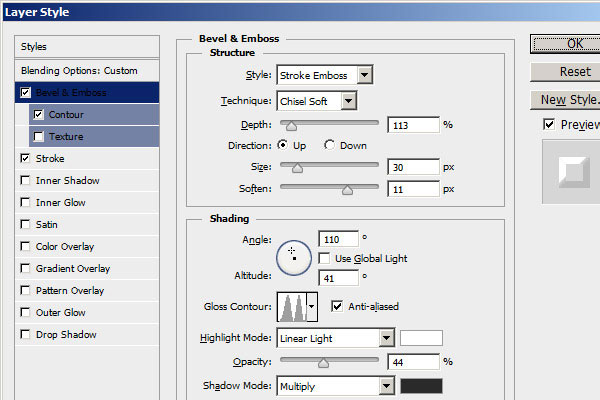
Bevel and Embos:
Style: Stroke Emboss
Technique: Chisel Soft
Depth: 113px
Direction: Up
Size: 30px
Soften: 11px
Higlight Mode: ffffff Screen 97%
Shadow Mode: 000000 Multiply 36%
Gloss Contour:Ring Double
Angle: 110 41
Contour: Half Round Range 0%
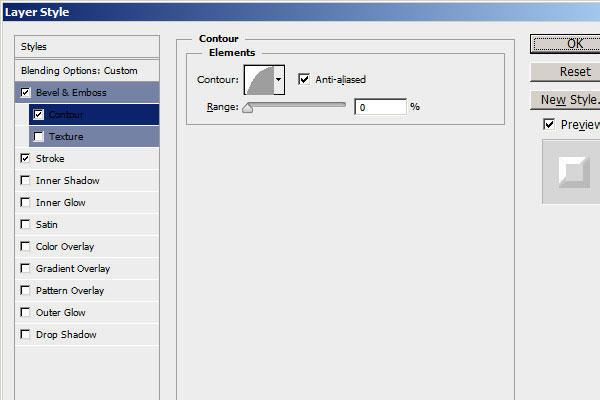

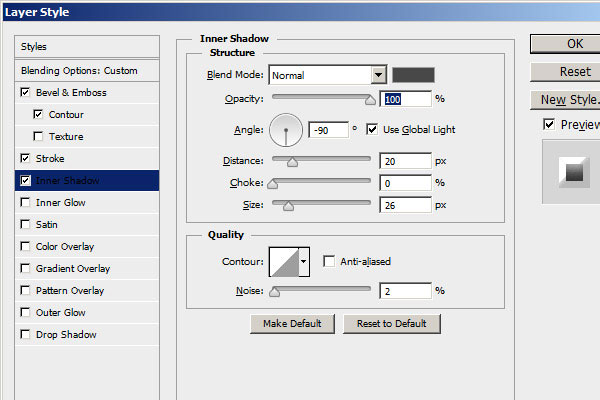
Inner Shadow:
Color: 484848
Blend Mode: Normal
Opacity: 100%
Angle: -90degrees
Distance: 20px
Choke: 0px
Size: 26px
Noise: 2%

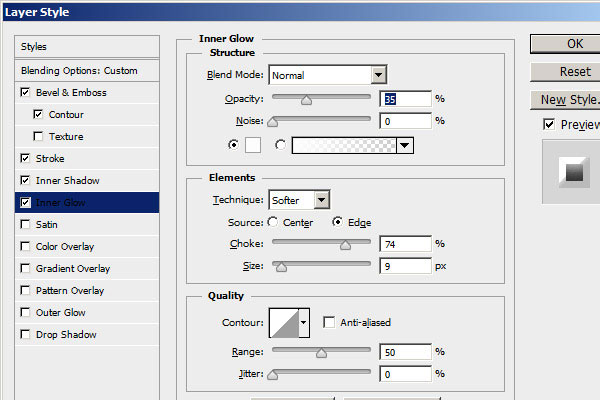
Inner Glow:
Blend Mode: Normal
Opacity: 35%
Noise: 0%
Color: ffffff
Technique: Softer
Source: Edge
Choke: 74px
Size: 9px
Range: 50%

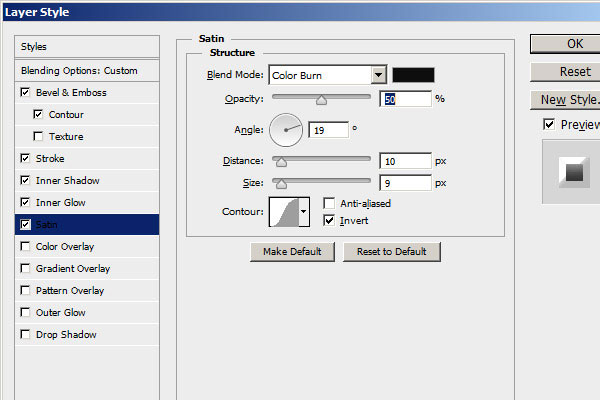
Satin:
Blend Mode: Color Burn
Color: 000000
Opacity: 50%
Angle: 19 degrees
Distance: 10px
Size: 19px
Contour: Gaussian Invert

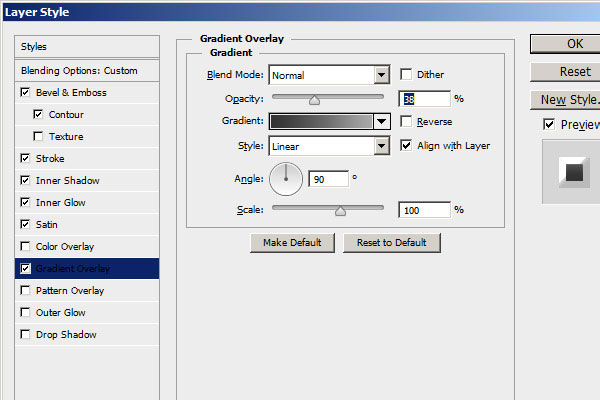
Gradient Overlay:
Blend Mode: Normal
Opacity: 38%
Gradient Ranging From: cacaca through 848484 to 333333
Style: Linear
Angle: 90 degrees
Scale:100%

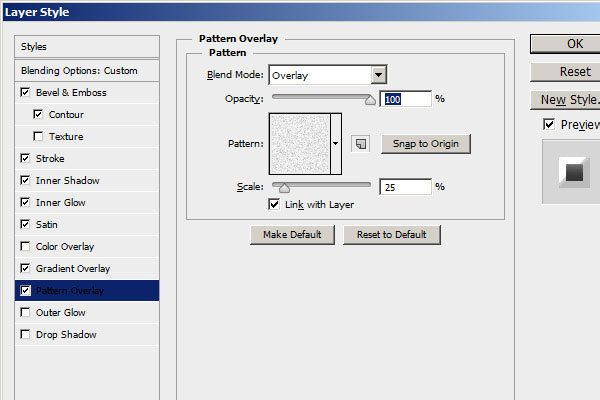
Pattern Overlay:
Blend Mode: Overlay
Opacity: 100%
Choose same pattern we created in first step of this tutorial
Scale: 25%

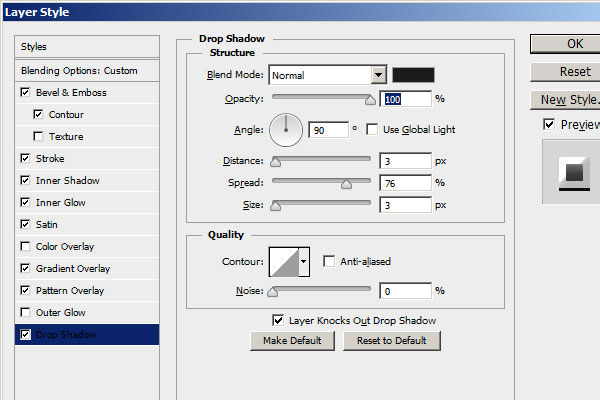
Drop Shadow:
Color: 000000
Blend Mode: Normal
Opacity: 100%
Angle: 90 degrees
Distance: 3px
Spread: 76px
Size: 3px
Noise: 0%
And we are done!

I hope that you liked and found useful this tutorial . Please Leave your comments.
About the author
Copyright © . All Rights Reserved
