How to Add Lighting Effect to a Photo in Photoshop
Everyone, for sure, has once tried to capture lightning on photos. However, in most cases, no one succeeds. Firstly, it is too fast. Secondly, it is difficult to predict when and at what time it will strike.
It's always so offensive. Once, I went out into the street with an umbrella in the rain, waited, and waited for the lightning to strike, but nothing happened, and I went home. The moment I put my camera in the bag, the lightning stroke one time after another. I took my camera and started taking pictures, but, what a pity, I took ten photos, but none of them showed lightning.
And here you are, frustrated, come home, launch Photoshop and try to draw lightning bolts on photographs with an empty sky. But here, too, nothing happens. In this case, our guide will come to your aid.
So, today we are going to discuss how to create a realistic lighting effect in Photoshop step-by-step.
To begin with, choose a photo that you’d like to feature lightning.
It is mostly dark outside during lightning, so we have to remove the cheerful mood from our picture and add dark hues to it. A style like "Curves" will help us with this. We can find this adjustment style in the "Image" tab - "Adjustments" and the fifth from the top "Curves." Or simply press the hotkeys of this style "Ctrl + M.”
In the window that opens, a diagonal is drawn in the diagram, and we must give this diagonal the shape of an arc curved downward.
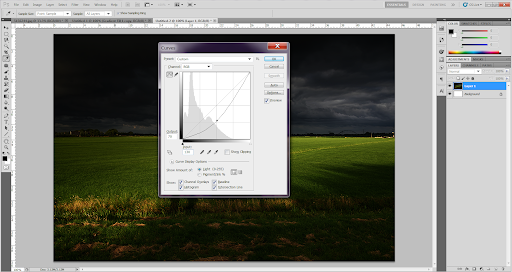
Now our picture is in the right mood, and in truth, a formidable one. It's time to draw the lightning itself. To begin with, create a new layer and draw a wide selection with the Rectangular Marquee Tool in the middle.
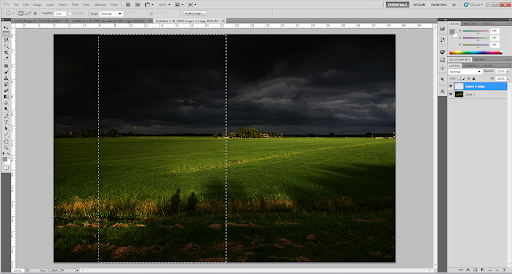
We fill this selection with a gradient with standard settings: Linear, Black and White. Be aware that the shape of your lightning will depend on how you fill the gradient, so experiment.
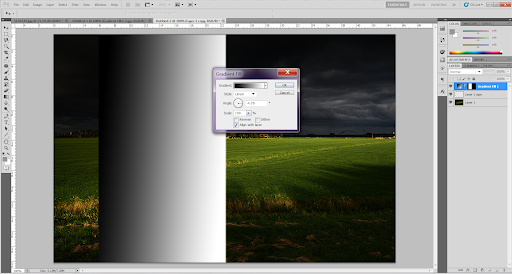
After filling the selection with a gradient, we need to apply the Difference clouds filter to it. This filter can be found in the "Filter" tab > "Rendering" > "Difference clouds."
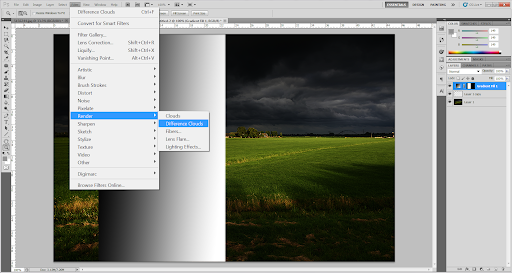
Our gradient is completely filled with something that looks a bit like clouds with a black lightning bolt in the middle.
If you are not satisfied with the outlines of our lightning, I advise you not to redo everything but simply cancel the "Difference Clouds" action in the "History" window and apply this filter again.
When applying the Difference Clouds filter for the second time on the same gradient, the lightning changes as new clouds are superimposed each time.
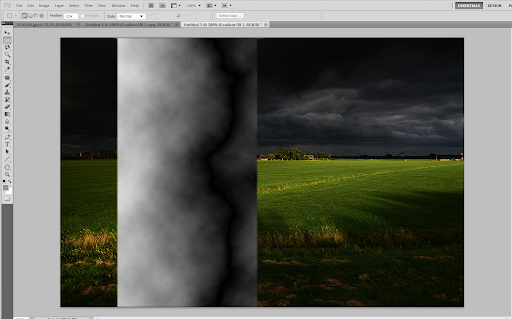
For our lightning to turn white, we need to invert our clouds. This can be done by going to the tab "Image" - "Adjustments" - "Invert" or just press the key combination "Ctrl + I.”
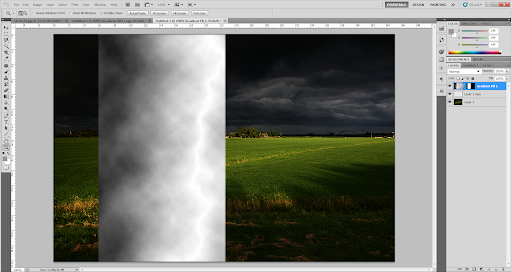
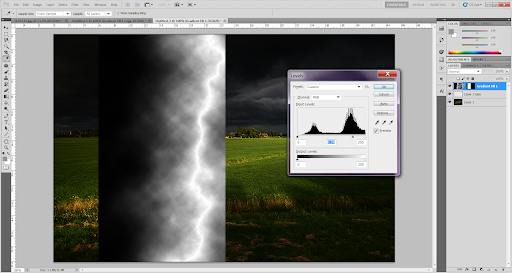
Our lightning is not very clear now, and it is very bright. To make it more realistic, you need to apply the "Levels" action to it, which can be found in the "Image" tab - "Adjustments" - "Levels."
When you click on this item, a window opens in which there are two settings. They can also be changed by moving the checkboxes. I moved the black flag to the beginning of the histogram, the gray one to the very left, and left the white one stationary.
If such settings are not suitable for your lightning, try to change the location of the flags yourself. Strive for such a result so that the lightning takes the shape you need.
Now our lightning looks just wonderful, but it is somehow not colored, and after all, everyone knows that lightning is electricity, and electricity has a bluish color.
To give our lightning a bluish tint, we need to apply a Hue / Saturation adjustment to it. We can find this setting in the same place as the previous ones in "Image" - "Adjustments."
In the window of this setting, we can see three flags "Hue," "Saturation,” "Brightness.” Check the box next to the item "Toning" in the lower right corner, and for those three parameters, the following settings: "Hue" - 240, "Saturation" - 20, "Brightness" - 0.
If you are not satisfied with the result of these settings, you can experiment with them by making your own. You can also make the lightning golden or yellowish here, but I hope you figure it out by yourself.
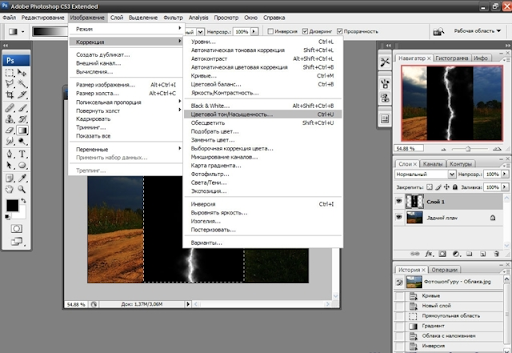
That's it. Our lightning is practically ready. Now, press the "Ctrl + T" keys and transform our image to the size you need. Clamp-on the black point at the corner of the image and reduce it to the size we need. But do not forget to hold down the Shift key while transforming to reduce the image proportionally.
But our lighting is on a black background and does not fit into our photo in any way. We need to change the blending mode to Light Replacement, after which the black layer will dissolve with the background, and the lightning will remain.
Now we need to lighten a little the place from where the lightning strikes.
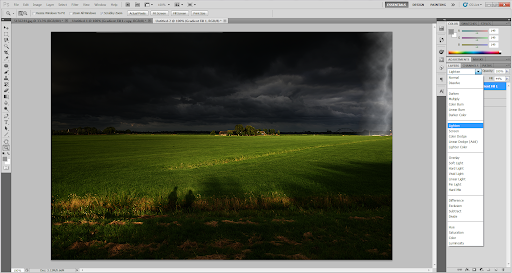
To lighten, we need to select the "Lighten" tool, hold down the left mouse button, and drag it over the place that we need to brighten.
If this tool brightens too much, you need to decrease the exposure, becoming less lightened.
That’s pretty much it. I hope you find this guide helpful. Now it’s your turn to create the realistic lightning effect in PhotoShop!
Copyright © . All Rights Reserved