Learn To Draw Walking Santa Using Photoshop

Hello Photoshopper, we know that Photoshop is a powerful software in photo editing and manipulation. But at this time let us learn to draw and paint using Photoshop without photo resources, look like a photoshop cartoon drawing tutorial in the eve of festive season. We can design a character from blank page and bring it into the scene of an illustration. And our topic in this tutorial is walking Santa on the land of ice.
Step 1 - Preparing new document
Create new canvas with 800 x 600 px dimension, then fill it with #009cff color setting.

Step 2 - Drawing the hat
Use Pen Tool (P), draw the red part of the Santa's hat. Use #c62a20 color. See the image below for reference.

Then draw the white part in front of red part, like this.

Step 3 - Painting highlight and shadow
To make it more attractive, we must add highlight and shadow on it. And before adding highlight and shadow, decide the position of light source, that is on the top right of the canvas. Press "Cmd/Ctrl + Shift + N" to create a new layer, name it "shadow", and set the blending mode on the layer pallet to "Multiply". Then create clipping mask by pressing "Cmd/Ctrl + Opt/Alt + G". Activate Brush Tool (B) with 0% hardness, 10% opacity. We may increase or decrease the opacity setting of the brush if needed. However, several thin brushing will be better than one thick brushing. Set color to black then paint carefully on the dark side area. Take a look on the image below.

For highlight, create new layer again (Cmd/Ctrl + N) and create clipping mask (Cmd/Ctrl + Opt/Alt + G). For this layer, set the blending mode to "screen". Use same brush setting and paint the light area with white color.

And Use the same way to paint shadow on white part of the hat.
Note: For the white part of the Santa's hat, we don't need to add highlight area because the color is white.

Step 4 - Creating the nose
Use Ellips Tool (U) to create the shape of nose. Use #b86835 for color setting. Then add highlight and shadow like before.

Step 5 - Creating the beard, hair and sideburns
Draw the shape of beard with white color and give it the shadow (dark side).

Use the same way to create "hair and sideburns". And remember that this layer must be located behind "beard" and "hat". And manage the layers by grouping.

Step 6 - Creating head and eyes
Draw the shape of head behind all of them. Use #ebb790 color setting for head. Then draw eyes in front of the head. For the head give highlight and shadow on it. For white part of the eyes, just add shadow only. And for black part of eyes, just add highlight only.

Step 7 - Creating glasses
The next step is drawing glasses. There are two parts, black shape and white shape.

For the white shape (lens), set blending mode to "overlay". Then give it a layer style.
Gradient Overlay
- Blend Mode : Screen
- Opacity : 50%
- Gradient : white to black
- Style : Reflected
- Angle : 90
- Scale : 100

Step 8 - Creating jacket
Then create the shapes of jacket, red (#c62a20) and white one. Locate these shapes behind all of the Santa's layers.

Then add dark side area (shadow) for these two layers (red shape and white shape) using Brush Tool, just like before.

And add highlight just for red shape layer.

Step 9 - Creating gloves
Draw the gloves shape with #c62a20 color.

For the left glove, this is the appearance of the shadow, so that looks like a clutching hand.
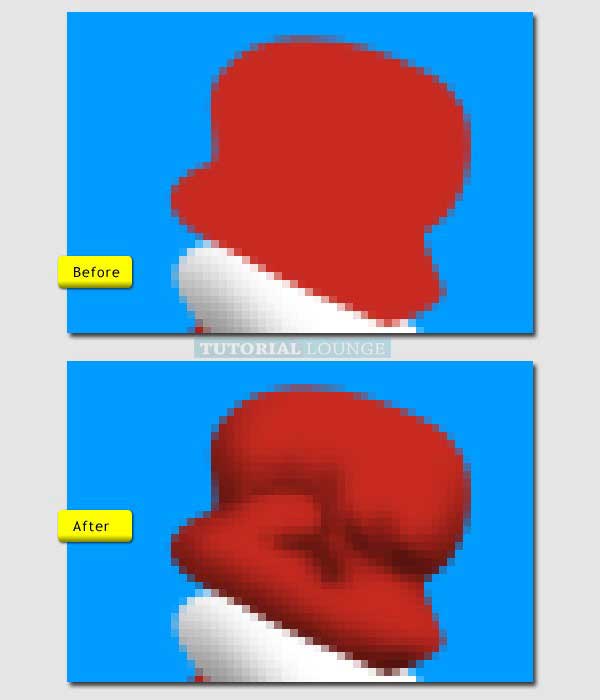
Then give highlight for it.

Also for right glove, add highlight and shadow.

Step 10 - Creating belt
Draw this black shape. Put it behind all of the Santa's layers.

Then draw this #cf7a00 shape.

Just like before, give highlight and shadow!

Step 11 - Creating feet
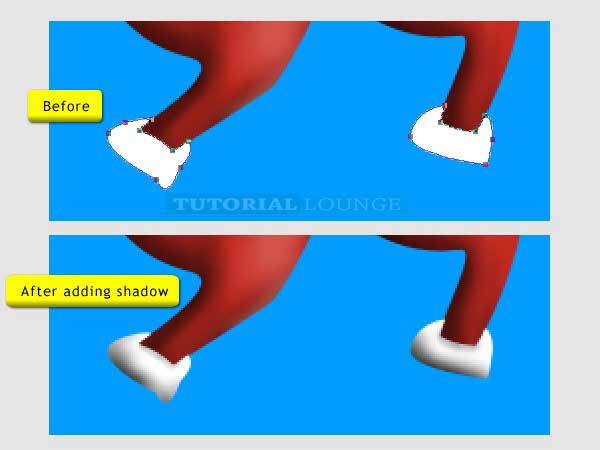
Draw the feet with #c62a20 color then add highlight and shadow.

Then draw the white part in front of red part and give shadow on it.
Step 12 - Creating shoes
Next, draw black shapes for the shoes then give highlight on it.

Step 13 - Creating sack
The Santa is bringing the sack on his back. So draw the shape of sack behind all the Santa's layer. Use #c18558 for its color. After that, paint the highlight and shadow on the sack.

Step 14 - Creating icy land
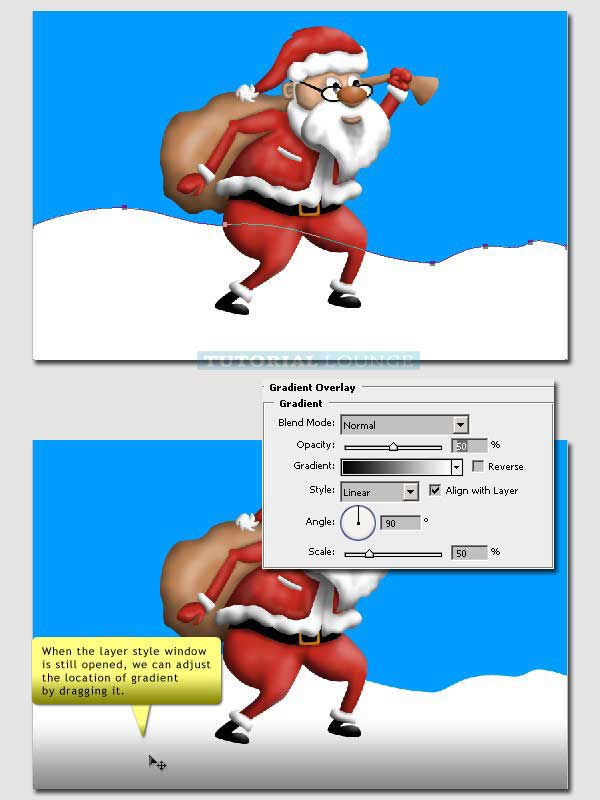
Okay, designing the Santa is over. Next create the land of ice. Draw the shape, we can use Rectangle Tool (U) and then edit it with Pen Tool (P). Take a look of the image below for reference. After that add layer style on it.
Gradient Overlay
- Blend Mode : Normal
- Opacity : 50%
- Gradient : Black to white
- Style : Linear
- Angle : 90
- Scale : 50
When the layer style window is still opened, we can adjust the location of gradient by dragging it.
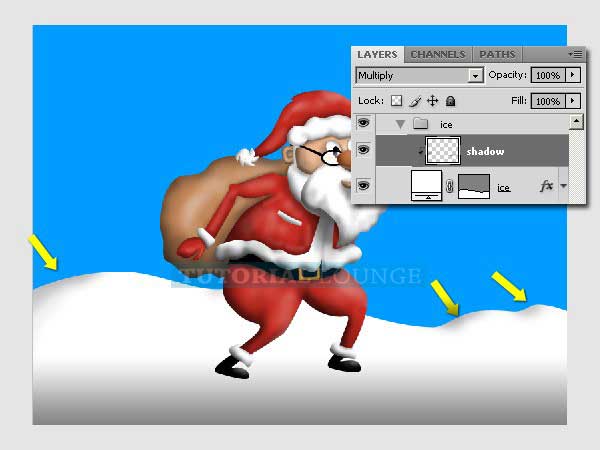
Add the dark area (shadow) to the icy land.
Step 15 - Creating road
Draw the road with Pen Tool (P), use #999999 (grey) color.
r
Step 16 - Creating sign pos
Activate Custom Shape Tool, then select Arrows > Arrow 12. For color, use #c18558. Adjust its length and proportion. Then add a rectangle to create the pole of sign pos.

The shape of sign pos will be better with wood texture. Now set the foreground color to #c18558 and background color to #794620. Then click Menu Filter > Render > Fibers. The shape layer will be rasterized before applying filter. For the fibers setting, set variance to 20 and strength to 10. After that, we need to add Bevel and Emboss layer style.
Bevel and Emboss
- Style : Inner Bevel
- Technique : Smooth
- Depth : 100%
- Direction : Up
- Size : 1px
- Angle : 45

Step 17 - Giving text
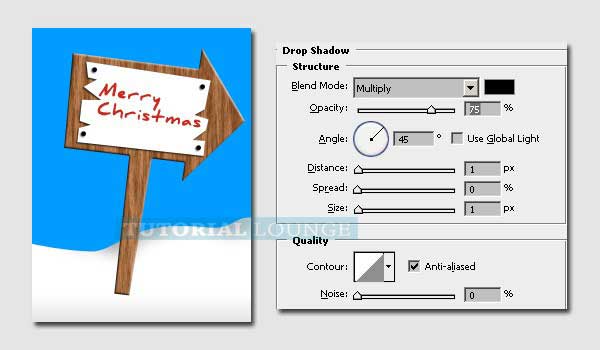
Activate Rectangle Tool, create a white rectangle on the brown wood. Then edit it with Pen Tool to get natural shape. And this white part needs Drop Shadow layer style.

Add your text "Merry Christmas". Red text with white background looks good.

Use Ellipse Tool to create small black circle and duplicate (Alt + Drag) it onto four corners of the white parts. Yeah, these are nails. Add Drop Shadow with 1 px distance and 1 px size to get more natural looking.
Step 18 - Adding snow
The sign pos have been standing up on the icy land, it must be snow-covered. For creating snow wadding, use Pen Tool (P) to draw. Then add the dark side area (shadow).

And of course the snow has shadow on the wood. So go back to clipping masked layer above brown wood (shadow layer) then paint the shadow of snow with soft black. And also do the same way for clipping masked layer above white part too.
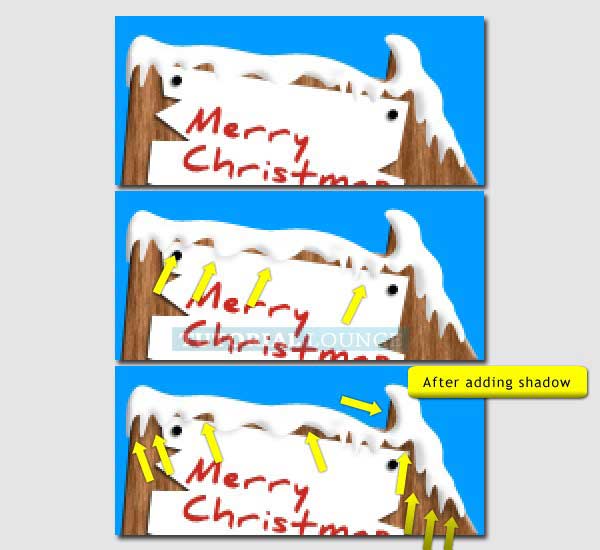
Use Pen Tool (P) again to draw lower snow. Then reduce the layer opacity to 60%. See image below for reference.

Step 19 - The additional ice
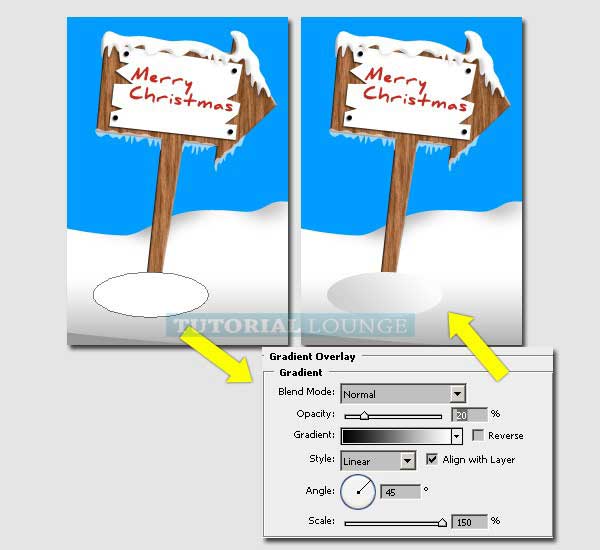
The additional ice is needed to drown the pole of sign pos into the icy land. Draw it using Ellipse Tool, then add layer style.
Gradient Overlay
- Blend Mode : Normal
- Opacity : 20%
- Gradient : Black to white
- Style : Linear
- Angle : 45
- Scale : 150
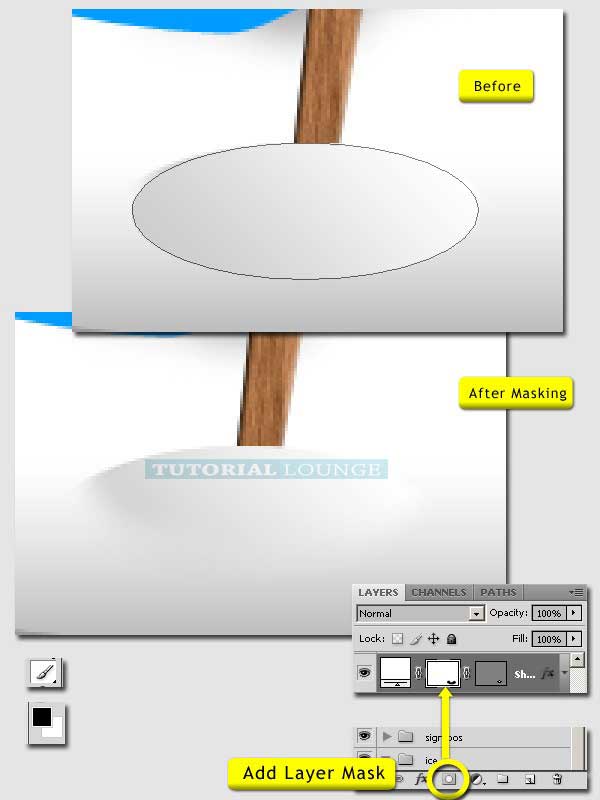
Lower part of this additional ice has to be hidden to get more realistic. Click layer mask icon, and then paint with black using soft Brush Tool (B).
Step 20 - Painting the shadow
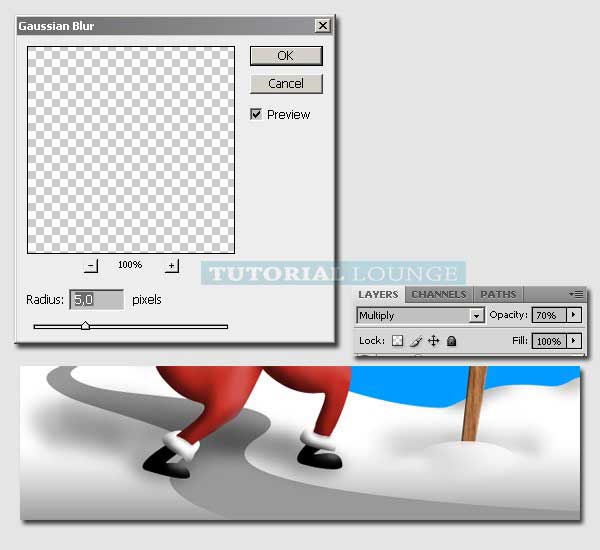
Hit "Cmd/Ctrl + Shift + N" to create a new layer and set to "Multiply". And make sure this new layer is in front of the road layer, and behind the Santa, sign pos and additional ice. Then use Brush Tool (B) with low hardness to paint the soft black shadow.

To make this shadow softer, use Gaussian Blur, then reduce the layer opacity to 70%.
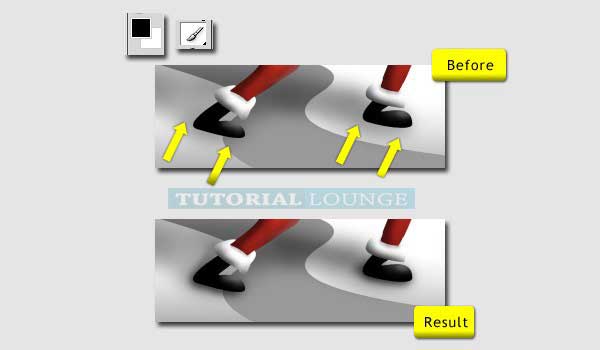
We have to add shadow again to get more realistic result. The shadow which give the effect if the Santa's shoes are really contact with the ice. Create new layer with "Multiply" blending. Then paint the contact shadow near Santa's shoes. This new shadow must be thicker than before.
Step 21 - Night effect
The next step is make night effect to the sky. Just use "Gradient Overlay" layer style.
Gradient Overlay
- Blend Mode : Multiply
- Opacity : 75%
- Gradient : White to Black
- Style : Linear
- Angle : 90
- Scale : 50
You can drag the position of gradient when the window of layer style is still opened.

Step 22 - Snow everywhere
Create a new layer above all layers. Use soft round Brush Tool (B) with 0% hardness and 100% opacity. Do some clicks on the canvas. Increase and decrease the brush size to create various snow. After that, use Gaussian Blur.

Create a new layer again and repeat the making of snow, but not need to add Gaussian Blur.

Final Image
And this is the final image of the tutorial.

Copyright © . All Rights Reserved