How to Make Cool Social Media Icons (Exclusive Tutorial)
As web designers we have to use social media icons all the time don't we? Sometimes we need to find cool and stylish icons to match our designs. We normally go through the internet to find some. Since we are designers why don't we make some our own way? Now that's where this tutorial comes in handy. Let's get out designer faces on and get started.
Step 01
Let's get our all time favorite Photoshop open and create a new document. Well size is up to um creating a 125 x 115 here. After you are done with that get the ellipse tool out (U) and draw a nice circle across your canvas. Don't worry about the color it doesn't matter because we are going to apply a gradient over it later. So far it looks something like this.

Step 02
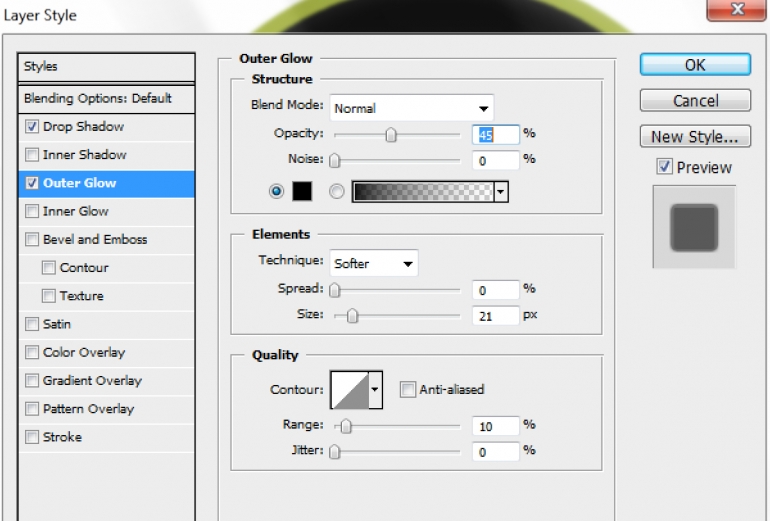
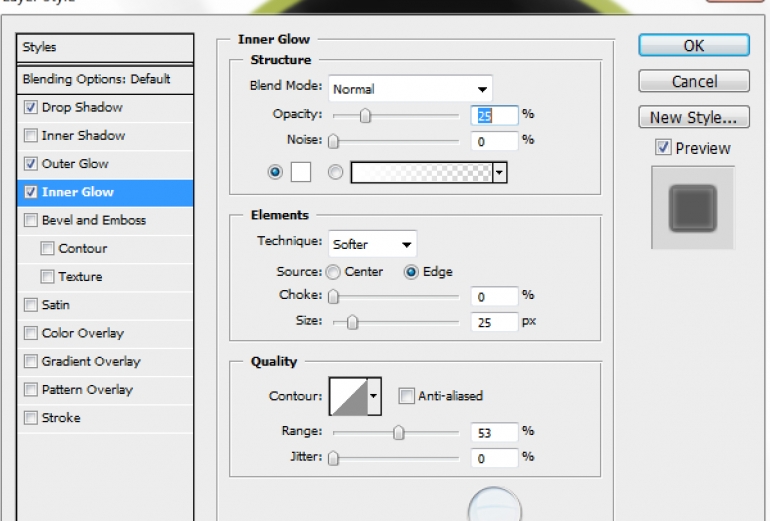
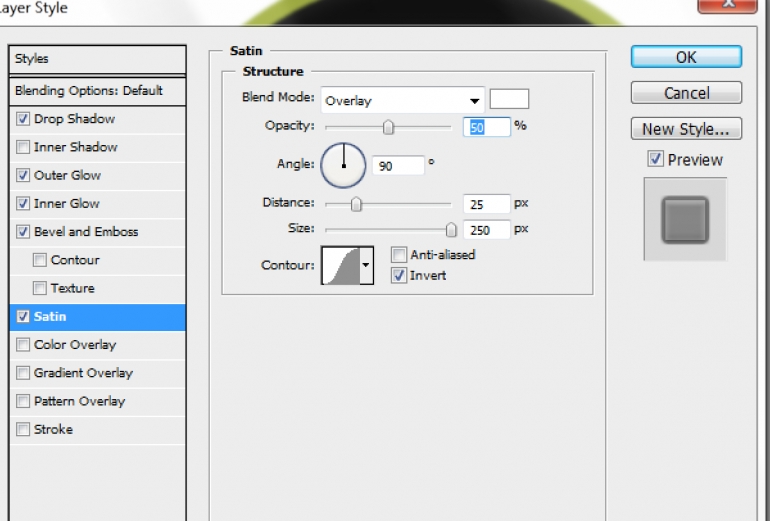
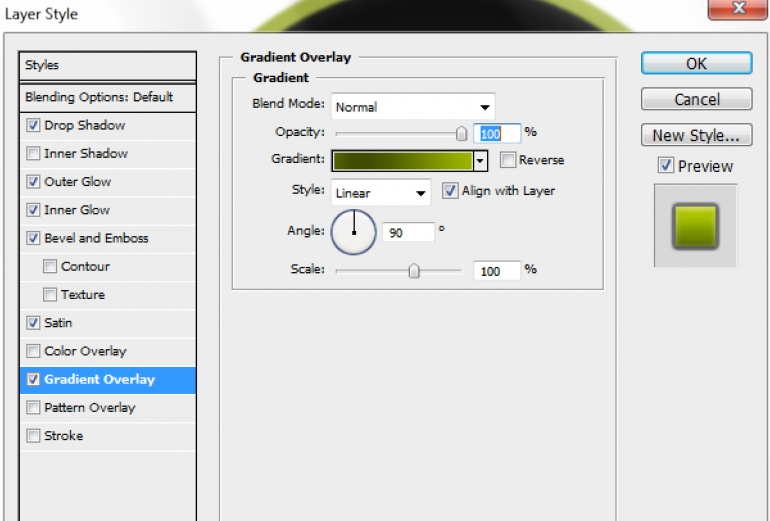
Now this is the fun part. Get our circle shapes layers blending option menu out by simply double clicking on the layer in layer pallet or right click on the layer and click on the blending options. After you bring that up apply the following effects on it.
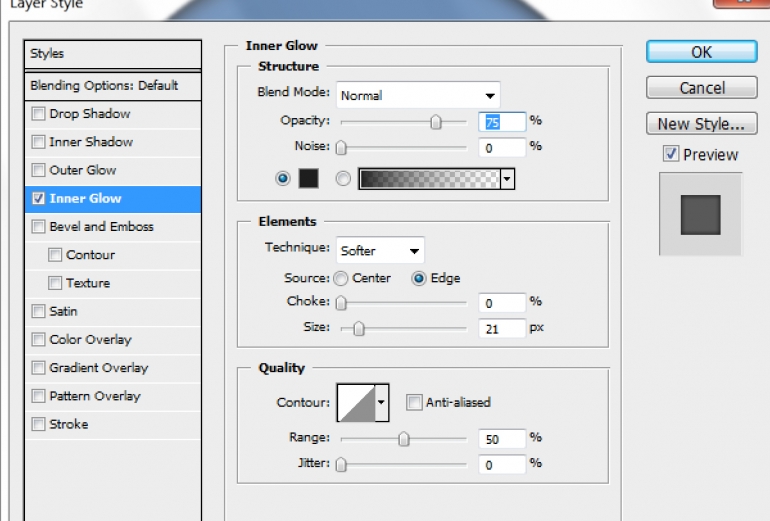
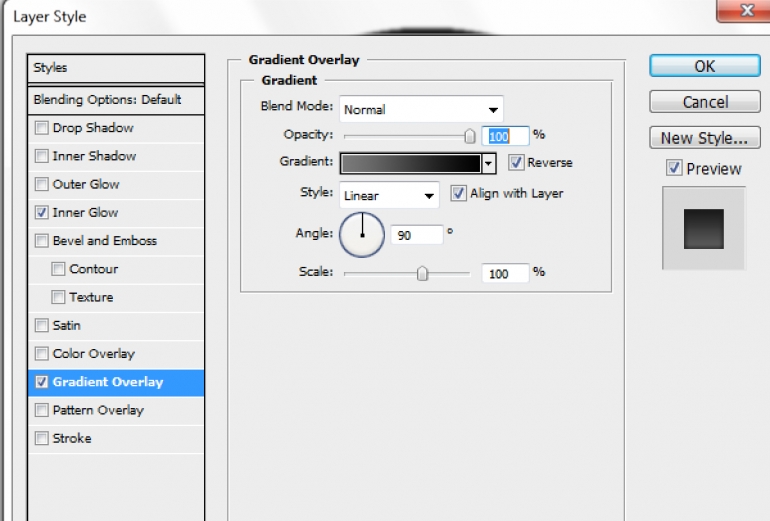

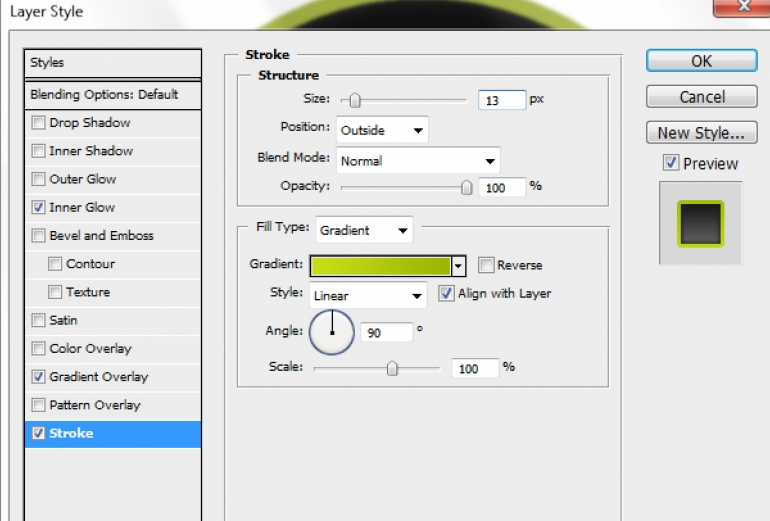

After you work that out you should have something like this.

Step 03
Let's get the social media icon in. I'm using the Facebook logo here well I got it off the internet of course. Import it up and place it inside the cool circle we made. You know something like this
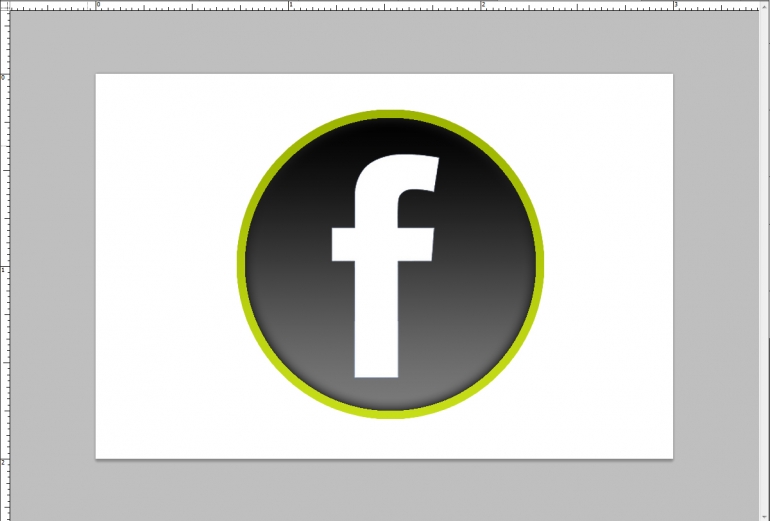
After you do that, apply the following effects to it



Let's see the magic shall we? Looks really cool doesn't it?

Here's something I made with this.

You can mess around with the gradient and shape and bring up something new. See ya again with a new tut.
Copyright © . All Rights Reserved