How To Create A Heart Icon In Adobe Photoshop
Hi friends, here comes a tutorial in photoshop. The month of February is going to start and so every one will start having the valentine's day fever and here is tutsfriend's contribution in promoting the fever. In this tutorial we are going to learn how to create a glossy heart icon in photoshop.
Step 1: Open a new document of size 500 px X 500 px
Step 2: Now take the gradient tool and click on the gradient editor and choose the following colors in the color stops.
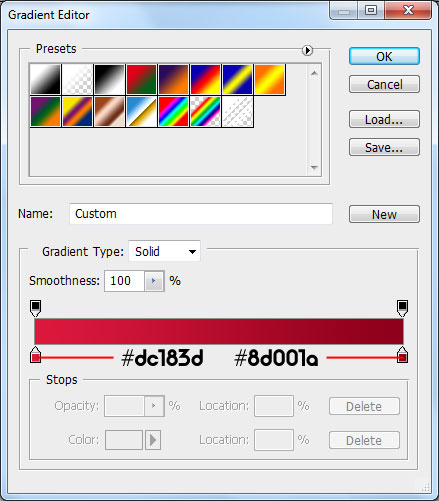
Step 3: Choose radial gradient and click and drag it from here to here and you will get an output like this.


Step 4: Now download the following custom shapes from here.
Step 5: Now take the custom shape tool, go to the properties bar click on the small down arrow available near the shape and next on the small right arrow available and choose replace shapes and load the currently downloaded shapes.
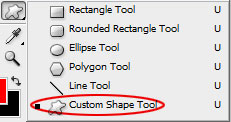


Step 6: Now choose the custom shape tool, shapes option from that and the following shape from the currently downloaded shapes

Step 7: Click, hold shift and drag on the stage to draw a heart like this.

Step 8: Now add the following layer styles by clicking on the fx icon available at the bottom of layers palette


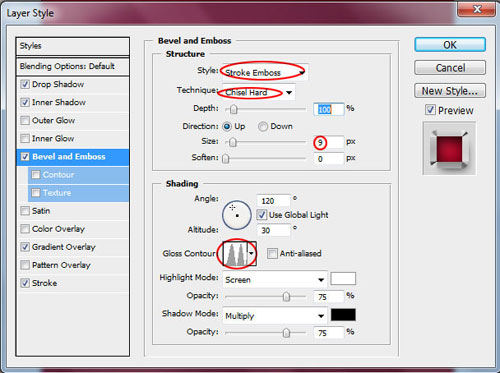
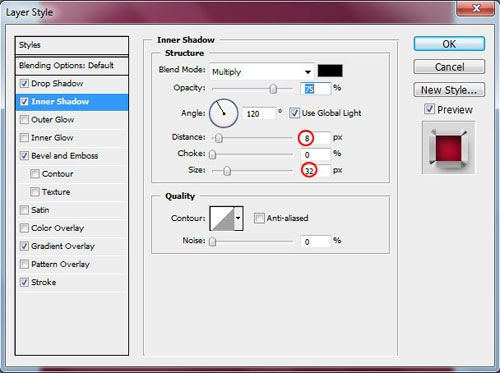


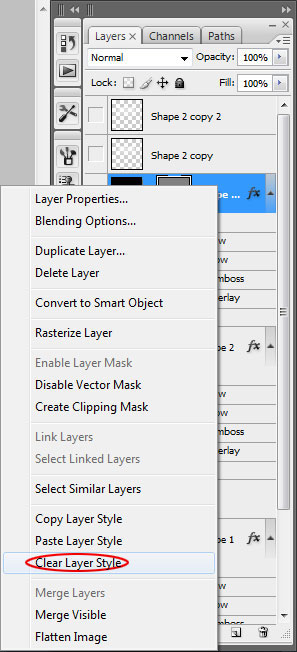
Step 9: Now take a copy of the same heart layer and right click and choose "clear layer style" option.
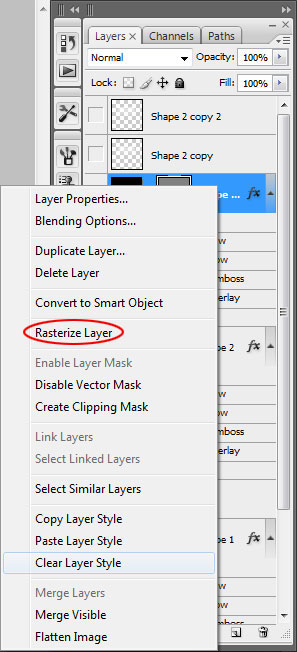
Step 10: Right click in that layer again and choose "rasterize layer". Then press ctrl + T and make it a little bit smaller.

Step 11: Now hold ctrl and click inside the thumbnail of the heart layer in the layers palette

Step 12: Press delete and then choose gradient tool and choose the following colors in gradient editor and choose linear gradient and apply the gradient in the following manner.


Step 13: Now press ctrl+D to deselect the selection and after that goto filters-> blur-> gaussian blur and apply gaussian blur till you get your desired output. I applied 9.7.

Step 14: Thus the heart icon is ready.

About the author
Copyright © . All Rights Reserved
