


First and foremost, let me provide you with an example of what i hope to teach you all to re-create.
It is sometimes tempting to go head-first into making a reflection, often with a simple mirror approach. However this often proves to be the most un-appealing version of a relection when used improperly.
Since it is most common, and it is the easiest to do, I shall start off with a simple mirror trick.
For this we need a stock photo, preferably one without a mirror, but one that could have a mirror and still appear natural.
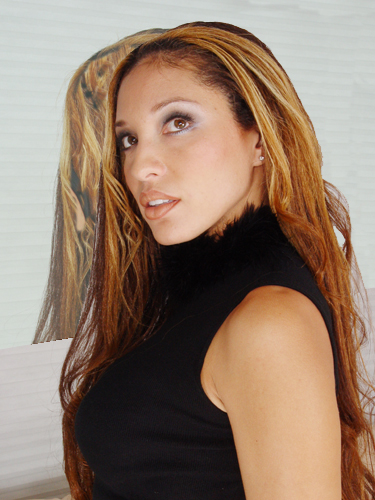
I have chosen this image

Source: Celesteharrell.com
The image will still look decent with a mirror in it, however i will
need to create some bodyparts (not a huge deal, you however may want to
start with something more simple, a cube or other geometric object is
going to be your best bet.)
The first decision to make is what kind of mirror will be used. In this
i'm will re-create an art-deco type mirror (frameless). You may just
want to do an entire layer of mirror.
Before you begin work, you ,ay want to read up on what the physics of a
reflection are, so you can understand what is going on and why.
Ok, here is the process I used; First off, I need to make a layer that
will represent the mirror. I start out with a vector shape. The shape
has no reflection and is a very subtle blue-green (the tint of the
mirror). The shape has no perspective, so this must be done now.
At this point the vector is sitting above the stock photo, so that I
can see the woman, I must change the opacity to around 50%.
I need something to put in the mirror, in most cases this means
flipping the image, however since the woman is infront of the mirror
the image would not flip. If she were to the right or left this would
not apply, in that situation her image would need to be flipped
horizontally. If the mirror is above or below the object, a verticle
flip is nessisary. This can lead to trouble as occasionally (in this
case) you now sisplay something that is not shown and therefor dose not
exist, this takes experiance and a basic understanding of third
dimension and the human form.
Now i select the mirror, take the selection to the layer with the
woman, and duplicate the area. I bring the image above the mirror. This
will be the layer of what you see in the mirror, the other image will
be the tinting (witch I will explain later).
The mirrored image is not going to be visible if it is directly behind
the stock photo, so it needs to be broght to the left of the woman (due
to persepctive the the theory of reflection [this is why your junior
year of science was so important kids ;)])
The image now has blank spots that need to be filled in, since I am
going to assume the background of the stock image is around the entire
'room' and that she is in the middle of the 'room' (like a hallway
setting) I will simply clone the existing backdrop into the blank areas.
The end result is crude, but can be fixed later on.
Now the hard part begins. This work is a pain in the ass, it is really
annoying and anal. It requires cutting around the object and removing
it from the background. The quickest way is teh magic wand at a
tolerance of 32 and some touchups with the eraser tool.
Once this is done the 'back' of her head must be created. In this case
it is all hair. To achive this you need to clone onto layer 2 the hair
on layer 1, you do this like you would normally clone, except you
select on one layer and draw on another. The dye-job on her hair is
showing the roots, so a simple understanding of hair helps in
determining where the hair will be 'transplanted' from so to speak.
Now that the mirror image is finished the tinting can begin. Mirrors,
despite bieng shiney, are still made of glass, and as glass is
translucent not fully transparent the image tends to pick up a tint of
blue or green (commonly inbetween). For this i'm using a seafoam. To
achive a tint you can either tint the image itself, or simply use
opacity and another level to alter the image below. This provides the
best method as it give you total control of how much is tinted.
I decided upon 25% opacity. It provides a pleasing tint.
here is the after-product.
as you will undobtedly see, this product is not refined, it needs alot
of care to be concidered finished, however i had to be rushed when
making this. Care should be taken in the edge of the mirror and the
contents of it. As you can see i did a slightly sloppy job, but the
idea and princibles are the same regardless of such.
I hope this helps you in creating reflections, a few more types will follow in other guides.