Fashion Victim - 3D Anaglyph Photoshop Tutorial
Before we get started you'll need the image below:
Images:
Background Stock - download
Vectors:
Floral - download
Step 1.
We'll be using the background image as the base for the size of this composition. Open the checkered floor background image and make sure that the resolution is set to 300 pixels/inch.
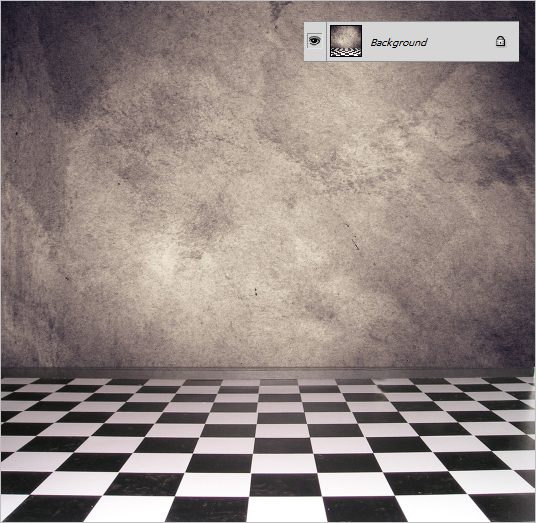
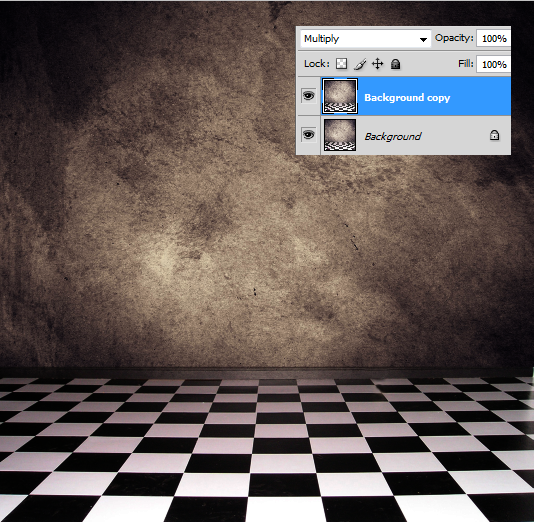
With the "Background" layer selected press Ctrl+J to copy the layer and then change the Blend Mode on the copied layer to Multiply.
Step 2.
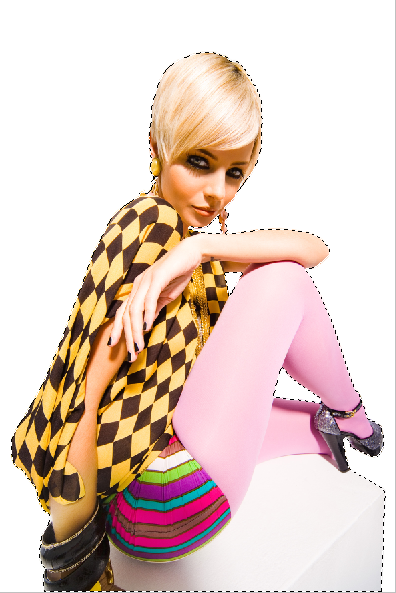
Now outside the main composition open the stock image of our female fashion victim. To maintain the integrity of the original image and avoid having to cut out our image again if any mistakes are made in the future we'll save our fashion victim as a seperate document.
With the Pen Tool create a path around the outer edges of the female model including the box she's sitting on. After you've made it around the outer edges create several more paths between her face and her earrings, her arm and her leg and between both her legs. Once your paths are drawn right-click on any one of them and choose Make Selection. Press Ctrl+J to copy the selection to a new layer.
Step 3.
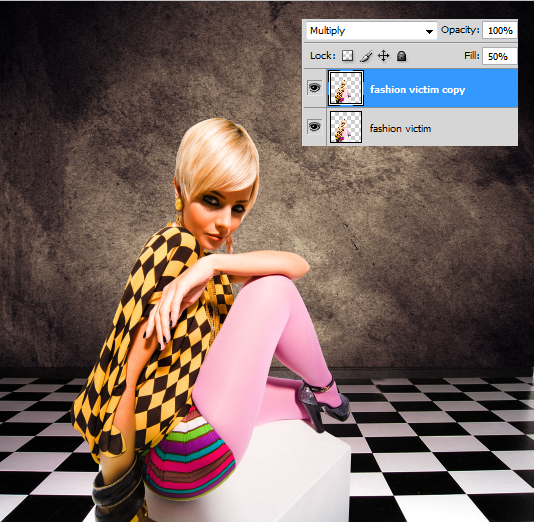
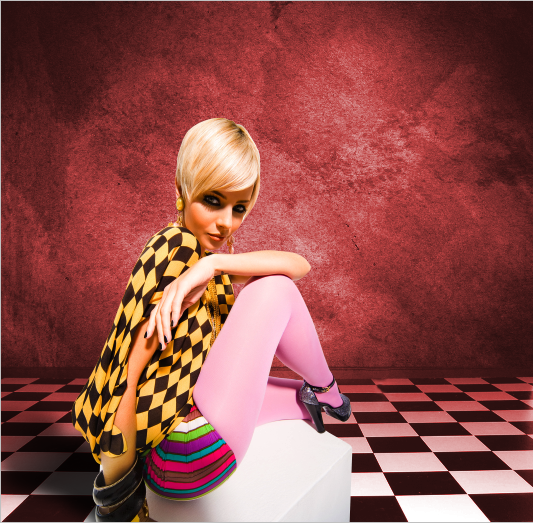
Drag and drop the cut out of our fashion victim into the main composition. Change the name of the layer to "fashion victim" and place her towards the left side of the image as seen below.
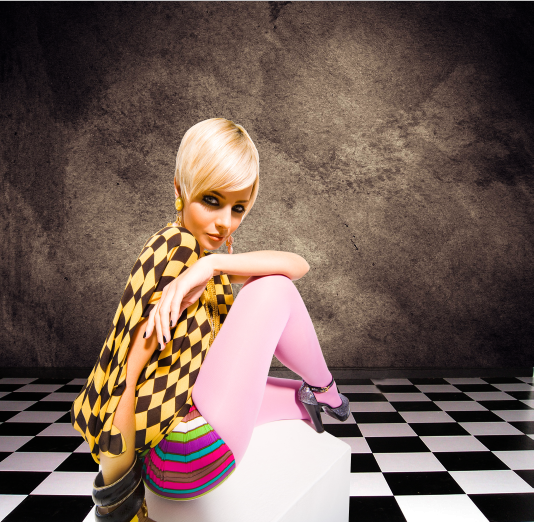
Press Ctrl+J to copy the "fashion victim" layer, change the Blend Mode on the copied layer to Multiply and reduce the Fill to 50%.
Step 4.
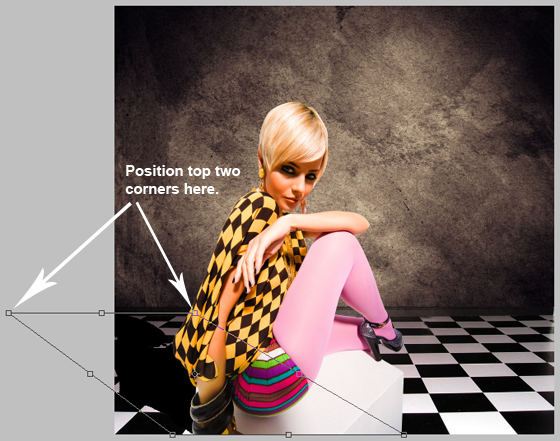
Create a new layer below the "fashion victim" layer and name it "model shadow". With the "model shadow" layer selected Ctrl+click on the "fashion victim" layer to create a selection. Fill the selection with black. Press Ctrl+D to remove the selection. We now need to distort the black model shadow by going to: Edit> Transform>Distort.
Position the top two corners as seen below.
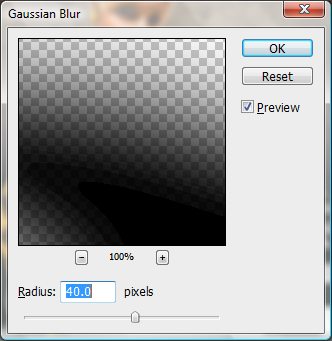
Apply a Gaussian Blur with a radius of 40 pixels by going to: Filter>Blur>Gaussian Blur.
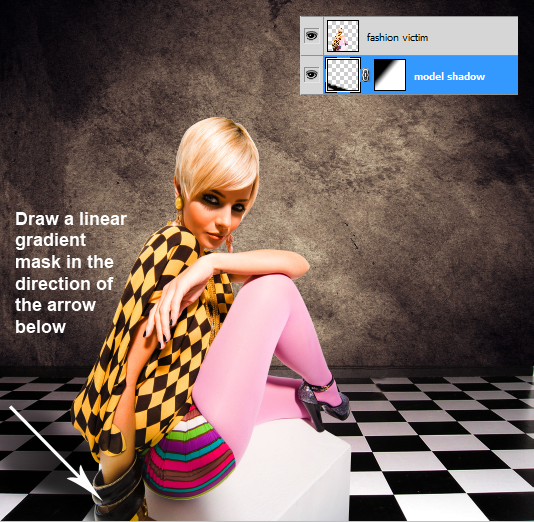
Next apply a layer mask. With the foreground color of black select the Gradient Tool and draw a linear gradient mask from the head of the model's shadow towards the model.
Step 5.
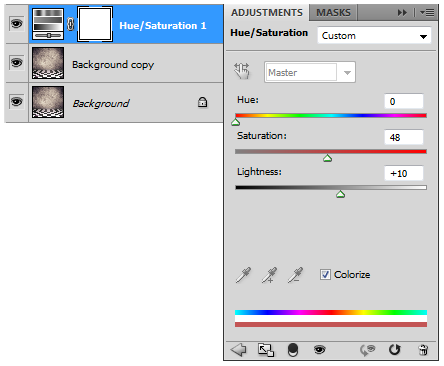
Select the "Background copy" layer and create a Hue/Saturation adjustment layer above it. In the Hue/Saturation panel check Colorize, set the Hue to 0, set the Saturation to 48 and the Lightness to +10.
Step 6.
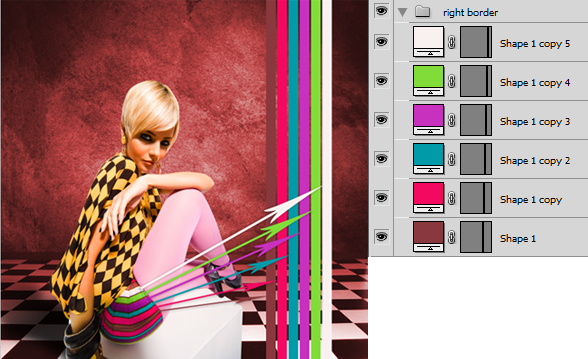
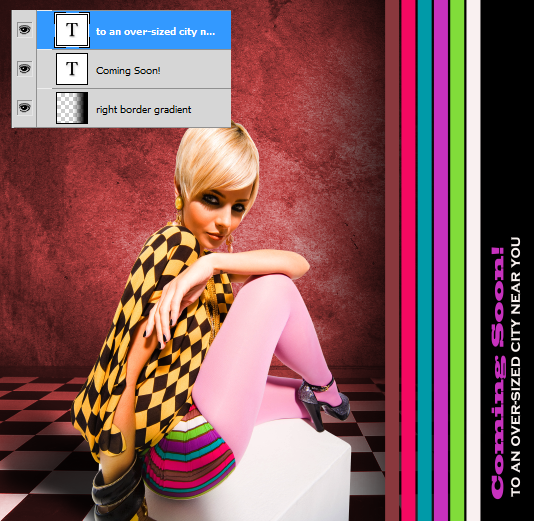
Create a folder above the Hue/Saturation adjustment layer and name it "right border". Inside the "right border" folder draw an elongated rectangle or long strip using the Rectangle Tool, which starts at the top of the image and goes to the bottom. With your new shape layer selected press Ctrl+J five times to duplicate the layer. Space them out equally leaving a small space between each. Now, starting with the first shape, seqeuncially change the the color of each rectangle to correspond with the colors on the fashion victims shorts.
Create a new layer inside the "right border" folder below the Shape layers and name it "right border gradient". With a foreground color of black select the Gradient Tool and draw a linear gradient from the right border to about the fashion victim's shoe.
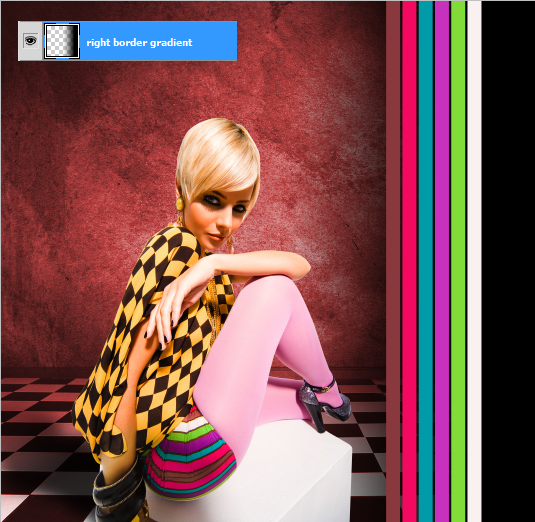
Above the "right border gradient" layer create a couple of text layers to display your message. In this example I created two. The first says "Coming Soon!" using the Blackoak Std font and the second says "to an over-sized city near you" using the Copperplate Gothic Bold font with both set to 30pt. Rotate each of them counter-clockwise by going to: Edit>Transform>Rotate 90 degrees CCW. Once again change the color of each text layers to a color found on the fashion victim's shorts.
About the author
Copyright © . All Rights Reserved
